

Welcome to the art Blog of Dan Beaulieu
Friday, December 14, 2012
P-53 Diesel Punk plane
Playing around with keeping my line work intact .light boxed pencils this time around but next time i may try inking .I'm a bit heavy handed typically with ink so I will have to try a thin brush or pens .

Sunday, November 11, 2012


Wednesday, October 31, 2012
Skull Island
haven't posted in forever!This is just a random personal art piece i decided to do . Did some quick sketches in my sketchbook a little while ago and decided to take this one the the painting stage.


Saturday, August 4, 2012


Saturday, July 7, 2012
Some childhood scribbles
I got a pile of my old art back form my mom a few years ago and its been buried in a drawer for the last while .I was going through my stuff and recovered these 2 gems and figured i would share .These are maybe me at 6 ?its hard to say .
the first one here was copied out of a book i had as a kid it was a page full of cave men ... persons? cave persons doing cave person stuff like picking berries and Hunting. Apparently it was cool enough for me to want recreate in red .Note the amazing arm on the left cave man and the giant log like spear in the tiny hand of the other .Poor 2 legged deer:(


the first one here was copied out of a book i had as a kid it was a page full of cave men ... persons? cave persons doing cave person stuff like picking berries and Hunting. Apparently it was cool enough for me to want recreate in red .Note the amazing arm on the left cave man and the giant log like spear in the tiny hand of the other .Poor 2 legged deer:(

This one was copied from my Empire strikes back Story book .Luke fighting Vader on Bespin clearly .My favorite part of this picture is Luke's dumb and dumber hair and the arm shooting out of his chin.Pretty epic.Also the scribbles were clearly drawn after and i am curious what compelled me to do that . Maybe its the dark side?


Friday, July 6, 2012
FOW Sherman Tank w/custom base WIP
bought this little tank a while ago and I am kind of on a painting kick right now so im going through my old bin of projects and finishing some stuff up.On one hand its fun just to do and on another its nice to finish up things you have had sitting around for years.
Flames Of War 1/100 scale(15mm) Sherman tank

Started with a small piece of wood and in pencil just traced out the general lay out of things.

In Photoshop i created a quick store front to print out and glue to a card then cut out the separate layers of card creating a 3D building face.the brick base was made of Sculpey and i filled in the back of the building with Celluclay a wet paper clay that dries light and strong and is great for filling in spaces .I then smoothed out the seams with a 2 part putty and sanded it .

I baked the wood and the Sculpey bricks together but attached the building piece after .I'm pretty sure Celluclay and 2 part putty is not good to have in the oven .

After priming it with grey spray primer paint i did a burnt sienna acrylic base coat .

Sherman tank in the land of chocolate!

First pass paint on the base using hobby acrylics

Sherman tank paint pass and a second pass of ware on the base

Some details.Its hard to tell but i shrank the window and the door by adding a paint boarder around the edges.It helped the scale of it over all.

Finished!

A penny for scale.

Thursday, June 28, 2012


Wednesday, June 27, 2012

Tuesday, June 26, 2012
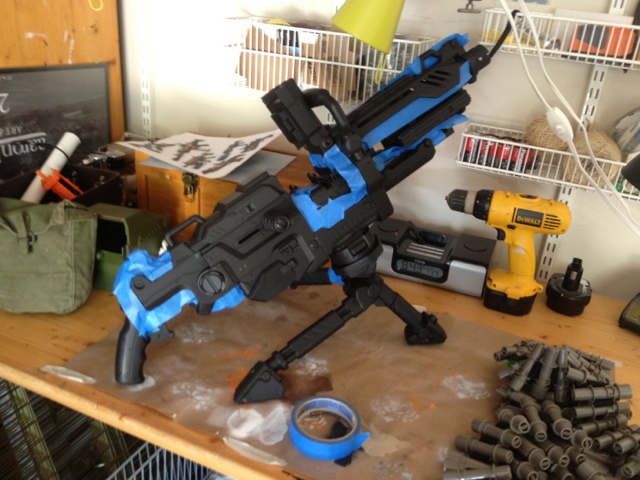
"Nick"Nerf Gun painting WIP shots
A generous donation from Nick Southam when he left Vigil ! Almost done with it and there will be some clearer shots coming .


Sunday, June 24, 2012

Wednesday, June 20, 2012


Tuesday, June 19, 2012


Starhawk Emmett Minecraft Fan skin
Congrats to the LightBox crew for making an awesome game! my fan tribute:)Go mine some stuff as Emmett Graves.


Monday, June 18, 2012
the making of our wedding cake topper
I decided I had to make our wedding cake topper pretty early on but i hadn't sculpted anything in like ..12 years maybe? Its been for ever anyway and i had to figure out how i was going to do this and do it in time .Here is some of that process
1-It was hard to know where to start so i just started with a stick man in Photoshop to establish proportions.
.jpg)
2-next thing i did was copy the stick man 6 times onto a 8.5"x11" sheet of paper and printed it out really light so i could draw and ink over top and do some thumb nails .I used the same figure for both of us even though she was going to be a mermaid and i was going to have a beaver tail.
.jpg)
3-i ended up liking a feature here or there and because they were all the same size when i scanned them in i could easily copy and paste what i liked all together.
.jpg)
4-Here is the cleaned up color version that i worked from .probably didn't have to go this detailed but it did help me work out a few things .I then printed this out to scale to build the wire armatures on top of .It was nice to be able to cut out the scale version and look at it and see if it was the right size for the cake .I guess between the point i painted this picture and the time i painted the topper i figured out i wanted a pink tie .
.jpg)
a quick note: I did a quick side shot of both figures for proportion in Photoshop (not shown)and in retrospect i should have spent more time on this step and figured more out on paper because it was a struggle to figure out in clay.
5-I created wire armatures and then made segments in Sculpey (an oven bake modeling clay) and then bake them so they were firm and i could then bend and pose them.
.JPG)
6-here they are posed with their joints filled in and baked .this is where i realized there heads were giant and their necks were pencil thin and this was going to be a challenge .pretty much every time i baked it they cracked and i sanded it and filled it in until eventually it was strong enough to hold the heads .
.JPG)
7-this is a few detail bake passes in .we look scary!i think there was a bunch of sanding at this point .
.JPG)
8-were close but were not holding hands! the next few passes were a lot of fiddly bits involving cutting bits off and sanding .for the hands i think i cut all there hands off and baked new slightly bigger ones separately including the set holding each other.After that i connected them back to the arms and sanded it .
.JPG)
9-primed and sanded and glued to a base !
.JPG)
in the sun !were ready for paint!

10-final paint job! i used acrylics for this which was pretty much a lot of craft paint and some artist paints .this went fairly smooth . Finished with many layer's of gloss coat for protection followed by a few layers of dull coat to cut down on the shine .


our mermaid and beaver butts!

you look ready for Italy!
We decide to wait until we got back home to post this up so it would be a surprise for everyone to see when we got there.They survived the trip there and back quite well which was a relief because repairs would have been very interesting while traveling:)
Now they sit in our home as one of the many reminders of our amazing Day on our Amazing trip and the amazing love we share .
Subscribe to:
Posts (Atom)