Friday, July 8, 2011

Trail.weekly speed painting

a couple hours . did some quick thumb nailing on paper then scaled and squashed it into what i wanted .


Thursday, July 7, 2011

Orbit 2

about an hour . hes embarking on a salvage mission .what will he find ? treasure ? death ? super death treasure?

Monday, July 4, 2011

Wednesday, June 29, 2011

Speed painting."Marooned"

hour and a half? we started doing themed speed paintings at work and its a total blast!its nice to pull the art cork out of my ass and just try and get an idea across.

 this is another "speed painting " i did last week that was anything but .spent hours and hours and got totally bogged down in noodling.gah.Some little parts of it i am OK with and  I did learn a few things and make some decent brushes  but i think there's alot that got lost in this. oh well on to the next.

Monday, May 23, 2011

Easy paint tool Sai

http://www.systemax.jp/en/sai/

I saw this a month ago when Nick Southam had discovered it and was messing with it.I played with it briefly today and i LOVED it . It has a lot of what i love about painter and Photoshop all squooshed into one .I'm sure its got its issues but I'm impressed with the realistic media brushes which are a breath of fresh air from the stampy crisp tools of Photoshop .
If its capably wasn't enough it takes up very little space AND uses very little memory AND costs 64.00! The low footprint makes if function well on a laptop to add to the goodness. This makes a very powerful painting tool available to the art masses which is huge when you think of the price barrier of getting started and getting your hands on legit software .Much like my art bag I'm really big on cheap cost , mobility and accessibly.

I think we will be friends.

PS- please don't let the crappinesss of the attached picture dampen your interest in checking the software out :)

Friday, May 20, 2011

there are many m 51 engineering bags but this one is mine.

a little flare added :) more to come I'm sure.

have been busy art'n but unable to post . hopefully soonish.

Friday, April 29, 2011

Revenge of the titans Art Kudos

i just finished Revenge of the titans yesterday at lunch and holy crap that was probably the toughest end boss/last level Ive ever faced !
Its really great to see the right art married to the right genre of game and i think this is a fantastic example .i was immediately immersed in the simple little story and the art was able to convey the same feel both during the game play and with the cut screens and UI .I would call this almost a high resolution pixel art .Beautiful.


nerdy game play note:
In the last level i finally figured out that linking up 4 radars to turrets dramatically extends their reach and ended up being key in taking out the final boss .If i would have known this early on it would have greatly changed my approach to the game i am sure.

Wednesday, April 20, 2011

playing with /making brushes

some oddness .i made a weird bush that makes a sort of texture oil paint brush .not super controllable but seems nice for quick under paint stuff.


Friday, April 15, 2011

Vigils First life Drawing Jam!

 Our studio along with some in company volunteers  put together a first ever life drawing session and it was a total blast! it was nice to get back into it because its a whole diffident art muscle set than drawing laser blasting pig monkeys . The only Life drawing i had attended prior was hour long posing sessions over 3 hours and this on the other hand  was several 5 min ,10 min poses and then a 20 min then finally a 30 min .Both have there merits but the latter givers you more opportunity  to try stuff out and grow. Thanks to everyone who put this together!!


Wednesday, April 13, 2011

New Blog !

Mine craft has been a fun little distraction as of late and i love that you can quickly re-skin your character when ever you like .I LOVE doing pixel art so this is a fun quick little exercise to put together a new texture and its fun to try and get across an idea with so few pixels .Fun!


http://torchandpick.blogspot.com/

Monday, March 14, 2011

Sketchbooks are in!!


Just picked up my sketchbooks! I have to say I am pretty satisfied with the job they did and they are now officially for sale.

the books are 8.00 dollars (us) each and are 40 pages signed  with a sketch.

you can pick one up here. 


Thursday, March 10, 2011

Gradient Map Tutorial

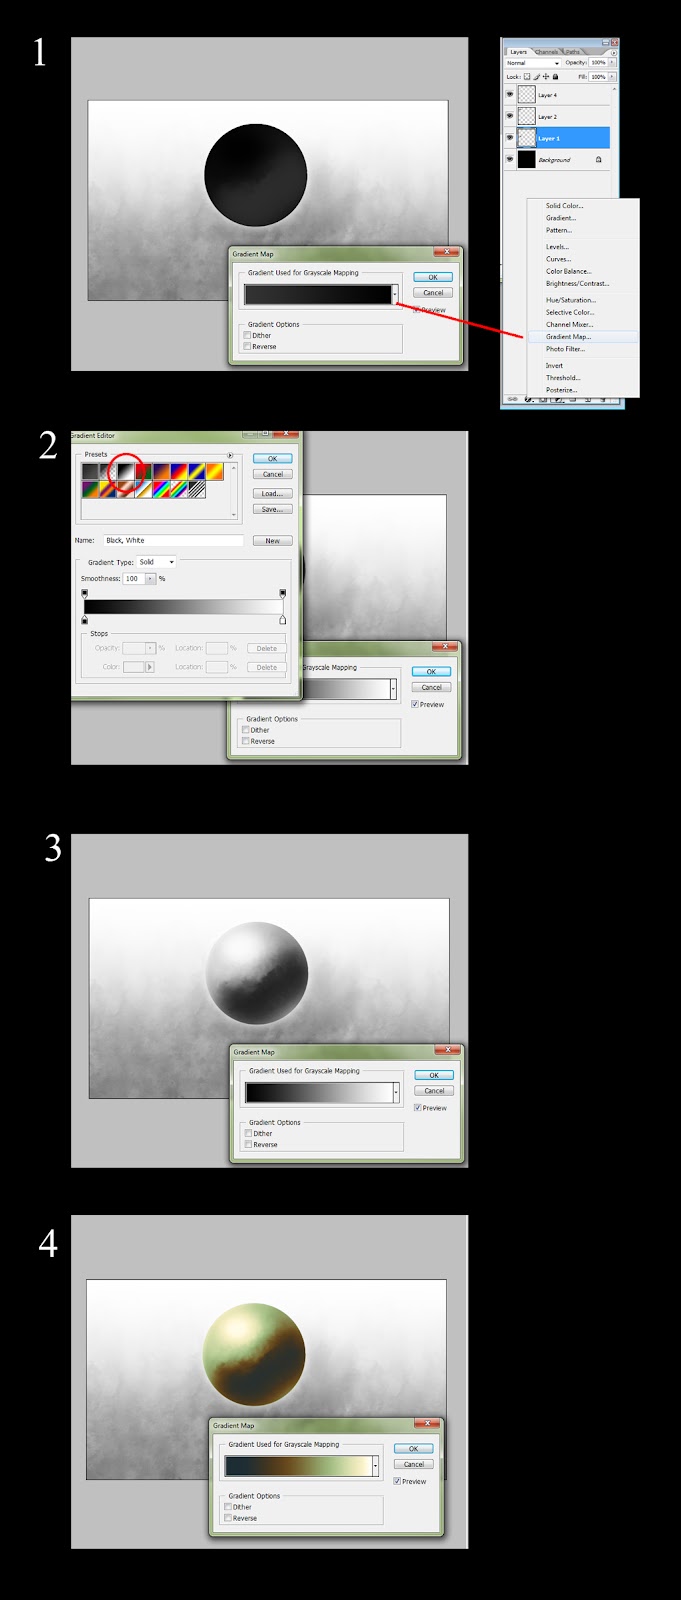
I discovered this about 2 years ago  and its a nice Little thing to have in your Digital tool box .I often find my self trying to explain the process to people but i feel like words alone fall Short with out some example.This  illustrates the steps involve but it definitely takes some individual experimentation to get it to work for you.

Lets Dig in!


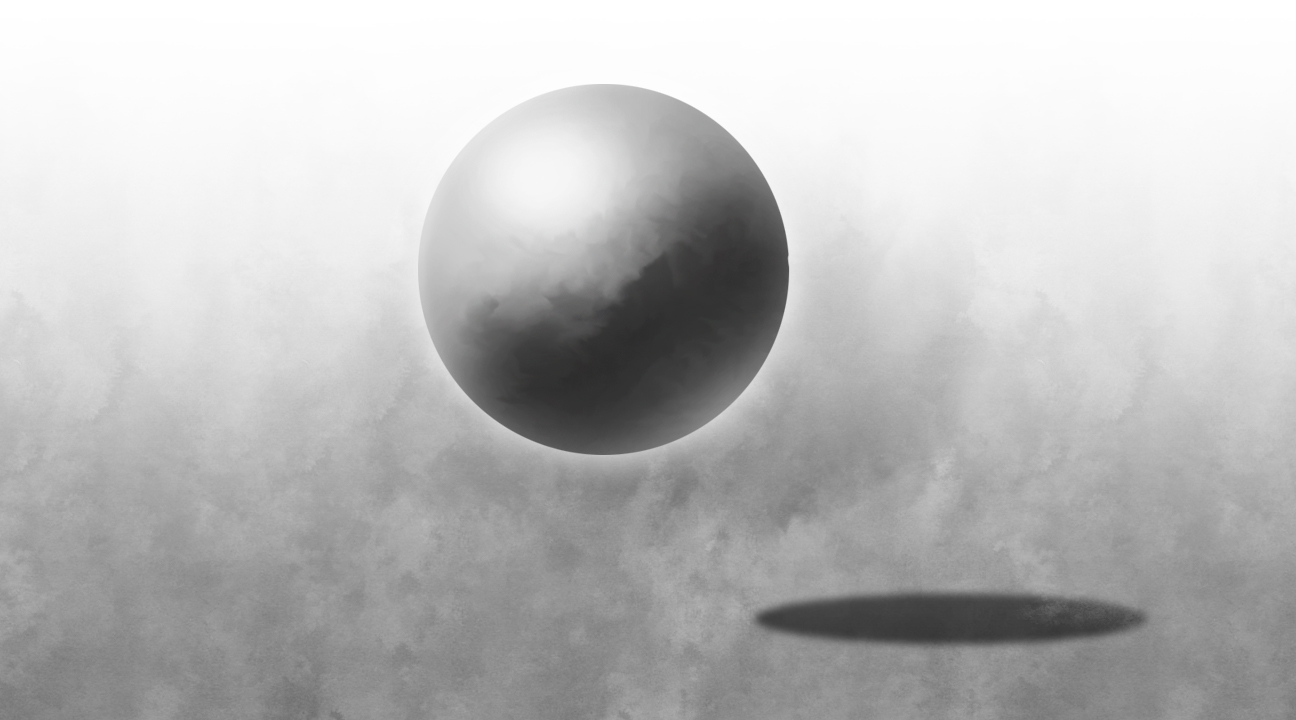
this will be our test subject .hovering sphere .make a selection of the sphere
  1. At the bottoms of the layers panel select the create new fill/ adjustment layer icon and select gradient map. It will look  immediately odd because it uses the first preset by default.
  2. In the presets select the 3rd preset in .this will make everything look normal again .This is because it is a gradient that goes from dark on the left to light on the right.this is important to remember in order to work with gradient maps.The color on the far left will be applied to the darkest value and the far right color will be applied to the lightest value.
  3. You are ready to start messing with colors!
  4. You can create or select the existing" tabs" along the gradient and adjust their color using the color swatch below the gradient.you will notice that each tab has adjustable points on ether side to clamp the color closer to the original point. You can also delete with the delete button or select one and repeat it elsewhere just by touching the gradient. A big part of using these effectively is sliding the tabs along the gradient so you get the right color matching the right value range . Try it out and see what you get.
 So you can see at the bottom you can get some nice smooth color transitions really quickly and i think it ends up looking much better than a simple overlay.Using multiple selections you can quickly color an image even if its only to get some base colors in .
A nice use for these in games is also matching colors between several textures by just dragging and dropping gradient map layers into other image files and then tweaking.
 I hope this is helpful ! If you catch any mistakes(which i am sure you will)  or can see places to make this tutorial better please let me know and i will edit .thanks!